Archive | DIY-Chic RSS feed for this section

A Custom Cabinet

17 May

A friend of mine recently asked me if I could restore an old mirror and cabinet she had but wasn’t loving it anymore. I of course jumped at the idea! It was fun working with her to pick out the paint color and overall style for her furniture. She picked Annie Sloan Old White for both pieces which I think is a great first choice.

erins cabinet 4

I loved the shape of the cabinet I knew a little paint would spruce it right up! I painted over the hardware and then took a rag and instantly wiped the paint away leaving a weathered look.

erins cabinet 5

I loved the glass knob she already had, and left that as is.

erins cabinet

I painted the inside of the cabinet paris grey one of my favorite colors.

erins cabinet 2

Here is the before and after!
erins cabinet 3

New and fresh! I didn’t forget about the mirror, here is a before and after.

erin mirror

LaurenSig

My Experiment With White Wash

19 Mar

Throughout my travels in the blogosphere I have discovered numerous posts and DIY about white washing furniture. I love the look, it turns the piece into a beachy cottage feel which is right up my alley. No seriously it’s literally right up my alley, the beach is about 4 miles away! After doing some more research I realized it’s actually really simple to do and it brightens up any piece.

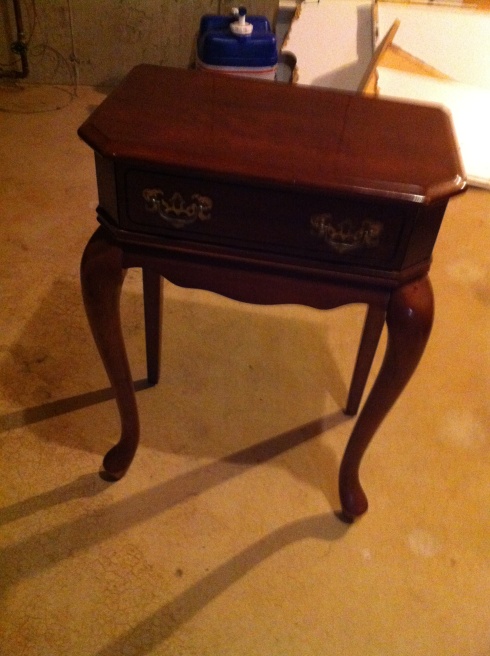
I decided what better way to experiment then with another Craigslist find, this small accent table. It was in great condition but of course I had to paint it! I know the photo is horrendous there is no excuse!

table before

I painted the table in Annie Sloan Duck Egg Blue, what a beautiful color! I wasn’t exactly thrilled about the end result, I am still learning how to use the dark wax and I felt this piece came out way to dark. If anyone has any tips on controlling the dark wax please let me know!!

The best thing about this paint is you can always change it! So I read about white wash and thought I would give it a try.

duck egg 6-001Basically white wash is exactly how it sounds, white paint watered down. The process I did was take a small cup of water and then used Annie Sloan Old White and would dip my paint brush in the old white and then just a corner of the brush into the water.

paint

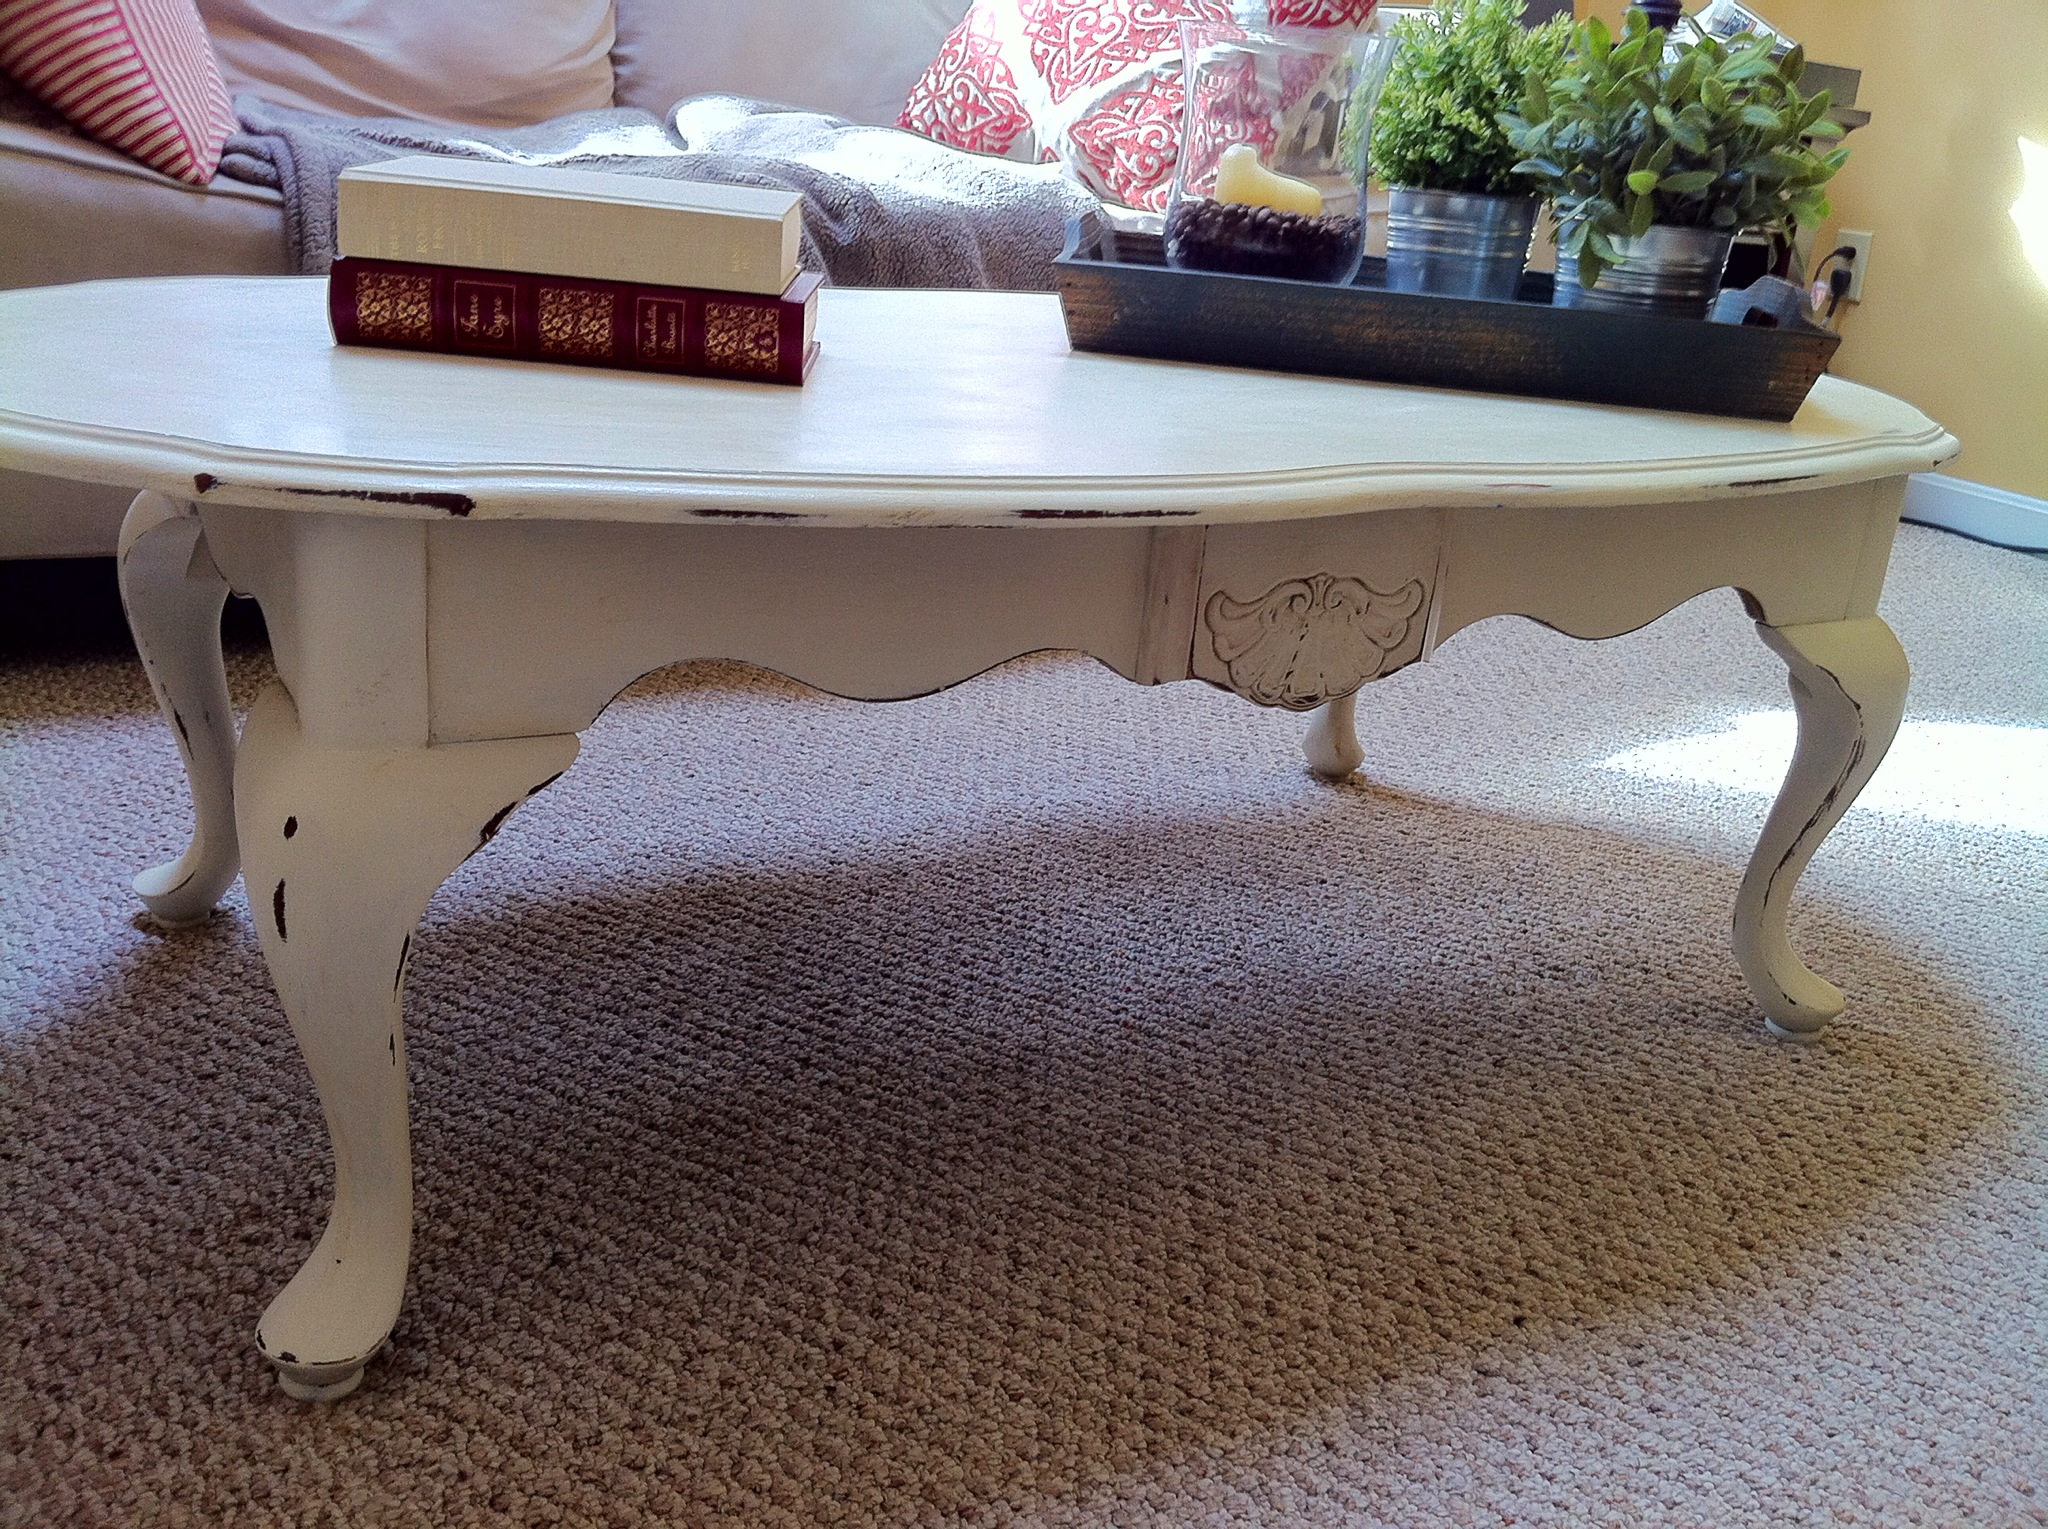
Simply paint the piece in sections and before it dries wipe as much or little of the paint you want off. This is what you are left with:

duk egg 3

I just love it, with the hints of white!

duck egg 4I think this option worked out well because the dark wax still peeks through a little bit but it’s not overwhelming. What do you guys think? Anyone else use this technique before?

LaurenSig

Transformation

14 Mar

For those of you who have been following me since the beginning (basically those friends I bullied into following me :)) you have seen this blog transform a few times. Bare with me because I am now addicted to refinishing furniture. I love finding pieces that need a little love and then making them pretty again! Here is my latest transformation.

I found this coffee table and I thought it has great lines and tons of potential. It’s solid wood but had a few scratches, nothing a little sanding and painting can’t fix. Sorry for the basement iPhone shot, I really need to get better at taking the before pictures.

coffee table before

I used Annie Sloan Chalk Paint in old white.

coffee 1

Of course I had to distress it a little!

coffee 3

I added the smallest amount of Annie Sloan dark wax to give the white some depth and age to it. It is an antique after all. coffee2 coffee5I just love this piece it’s so pretty! Sadly it will have to go since it doesn’t match any of our furniture!

Here are some other painting posts I love:

Chalk Paint

6 Mar

It was only a matter of time before I would be posting about Chalk Paint. All the other bloggers I follow were doing it so I had to  try, and now I am addicted! If you have never heard about Chalk Paint then at this point you probably think I am crazy, so let me explain. I have recently been using Annie Sloan’s Chalk Paint. It’s not chalk board paint as some might think. It’s a two-step process of painting furniture (or anything really) and then waxing it. That’s right, that’s all you have to do! No sanding, no stripping, no priming, nothing. It’s awesome, it’s fun to work with and as I said before I am addicted! I have painted many pieces that I will share later this week. Today I wanted to share my very first painting experience so you can see even a novice like me can turn something old and ugly into new and pretty.

I thought for my first “experiment” piece I would try our old entryway table, which since we moved has been sitting in the basement. It is a nice little table in good condition, but it was ready for a makeover!

side table 3

I did two coats of paint since the wood was so dark. You will not believe how fast this paint dries, seriously 20 minutes and you can start the second coat! You can see how it gets its name, it looks really chalky and powdery before you wax it. I distressed the piece before I waxed.

side table 4

Here it is all waxed and buffed!

side table

side table 2

So cute, right!?

LaurenSig

Anticipating Spring

5 Mar

So who is sick of Winter?! I certainly am! Seems about right though, once March rolls around and Spring is almost near I start to go a little crazy with anticipation for warmer days. In a desperate hope to hurry Spring along I put together a new welcome wreath for our front door. I started by looking for some inspiration via pinterest, because really if you need inspiration pinterest is the mecca for great ideas! A wreath by Too Much Time On My Hands caught my eye. It had all the flowers made from paper book pages, genius! Click Here to see the step by step instructions I followed.

Back when we first moved into our house last June I had constructed a wreath with our new house numbers on it. Click Here to see the old wreath and instructions on how I made our house numbers. I reused these numbers for my new wreath.

Here is my new wreath! I love it, I feel as if I am welcoming spring into my home, Go away snow!!! 🙂

wreath flowers wreath spring 2

LaurenSig

No Stress Distressed

2 Feb

Have you heard about the vaseline method for distressing wood? I know it already sounds messy and unnecessary, but I promise it’s worth it. I had been wanting a distressed painted box for my study to store odds and ends. Of course when you want something and go looking for it rarely is it found. I decided to make one of my own. In four easy steps you can take a plain wood box and give it a ton of character.

boxes

What you will need:

  • Wood box (mine are from AC Moore)
  • Paint color
  • Dark brown paint
  • Brush
  • Sanding block
  • Vaseline
  • Wood stain

DSC_1187

First I painted the edges of the boxes dark brown where I planned on distressing later.

DSC_1192

After the brown paint dries I rubbed vaseline along the corners of the box where I had just painted. Doing this step will block the top coat of paint from completely adhering to the wood making it easy to distress later. I then painted my top coat a light blue.

DSC_1194Next comes the fun part! After the paint dries I took a paper towel and rubbed away the paint along the edges and corners. It’s that easy and it comes right off! Then I just ran a sanding block over each box quickly.

DSC_1195You can be done at this step if you are happy with the look you have achieved. Or move on to the last step  which was apply a stain over the painted wood. I felt that the blue was just a little too new looking and too perfect. So I took dark chestnut Minwax stained one side of the box and then quickly rub off the stain. The trick is to not let the stain stay on for very long. What you are left with is a vintage tint, making the wood look older. The top of the larger box has been stained where the smaller box has not. See the difference?

DSC_1198

Here they are dry and ready for my study.

DSC_1201

Ballard Burlap Pin Board DIY

22 Jan

For months I have been eyeing this burlap bulletin board from Ballard Designs. I find that site so addicting! Everything on there is just my style, the prices however sometimes not so much. The burlap bulletin board starts at $89 and only goes up from there. After deciding I really wanted one a familiar thought crossed my mind…”I could totally make that!” Sometimes with these DIY you have to weigh the cost of the item and if it’s worth your time and trouble to make it yourself. This particular DIY is so easy and totally worth saving the $89 you were going to spend!  For reference here is the Ballard burlap board.

97601516896737526_wnk8EOas_c

So pretty, aren’t they?!

Ok what you will need:

  • Cork Board
  • Large piece of burlap
  • Scissors
  • Glue Gun
  • Furniture Nails

DSC_1143I then cut the burlap to be just a little larger than my board.

DSC_1144Then it’s as simple as folding the ends over and gluing. The burlap adheres to the wood really well, I thought I would have to hold it in place so it would stick better, but as it turned out that wasn’t necessary.

DSC_1145

Then just flip the board over and insert the furniture nails. I used black nails and spaced them three inches apart from one another.

DSC_1150 DSC_1178

It’s that easy, totally worth it! This board is so versatile it could be used as an inspiration board, wedding decor, party decor, a place to hang kids art work, really the options are endless.


A Personal Baby Gift

15 Jan

When a friend of mine told me she was pregnant with her first baby I was so excited! Excitement turned into shock when she informed me that they were not finding out the sex of the baby. She is one of my fellow event planning friends and by nature we hate surprises and must know everything in advance!! I admire her for waiting, it’s the ultimate surprise! I wanted to find her some unique onesies there are some really clever ones out there, but of course it’s a little harder to find some gender neutral ones. After a quick onesie search the thought that has been popping up in my head more and more lately returned “I could totally makes those!” So I gathered my supplies and decided to give it a shot. What do you have to lose? They don’t have to be perfect since the baby will mostly be wearing it for about an hour before needing a change.

What you will need:

  • Plain Onesies I used six month Gerber white onesies
  • Non Toxic fabric paint (which I think is all fabric paint, because really why would fabric paint be toxic??)
  • Stencils
  • Sponge
  • Piece of cardboard

baby all

Or add a little gender neutral colors instead of just black. What do you think, would you consider giving a personalized onesie?

babysingle


A Recycled Winter Mantel

12 Jan

There are so many great blogs out there with awesome DIY tutorials and tons of inspiration it can get a little overwhelming at times. I always surf my favorite blogs and finish being like “SO MANY GREAT IDEAS WHERE TO START!!!” I think sometimes it’s good to just take a step back and focus on something smaller. For instance (you knew my rant had to be going somewhere, right? :)) after taking down all the holiday decorations my mantel always looks so sad and pathetic. For some reason I have this aversion to just putting the previous mantel decor back up, I don’t know maybe it’s just me but I want something new and fresh for the New Year! Of course I can’t continue to keep buying things just because I get bored, so this year I decided to do a little hunting around the house to come up with something new/old for the mantel. If you don’t remember what my mantel looked like before all the fun holiday (and really why would you?) you can click here to check it out.

Here is the new look for the New Year:

mantelSorry for the poor quality photos my camera needs to be charged and I really wanted to share this! Everything except the large zinc K, I had in a different place in the house. This is a total mix match from old pieces that had a  home somewhere else. I think it came together nicely. Here is the breakdown of what’s what.

Lantern: Pottery Barn this was a wedding gift and I never really could find a good place for it.

Large Zinc K: Restoration Hardware (on clearance otherwise I would never be ok with buying it!)

Clock: Pottery Barn another wedding gift and it’s the only clock we have in the room so it’s nice to know what time it is!

Bookends: Old hand me downs from my parents I painted them white (they use to be gold). It’s amazing what a transformation old things can take with a little TLC.

Books: I am sure we all have a bunch of hardcover books that we never read laying around.

Twine bottles: These were a DIY project that you can find here.

Pitcher: This is a left over decoration from our wedding, inspiration can come from anywhere!

mantel 3

mantel 6

mantel 2

Need a little more mantel pick me up:

DIY Wooden Signs

10 Jan

There are so many tutorials on pinterest now about how to make vintage looking wooden signs. So I decided I would be adventurous and combine a few ideas and try my own.

What you will need:

  • Poplar boards cut to whatever size you want your signs
  • Grey and White Paint
  • Paint brush
  • Black Sharpie Marker
  • Printed words in whatever size and font you want.
  • Sandpaper, scissors, twine, glue gun.

I started out by spray painting the boards grey, you don’t have to use spray paint I just had some on hand. Then I white washed the boards. Pick and print the words and style you want I used words related to the bathroom but I have seen some really cute kitchen signs as well.

Poplar is pretty soft so I wrapped the printed paper word around the board and took a pen applied pressure to trace the word onto the board.

bathroom trace

There will be a faint indent of the word on the board when you remove the piece of paper. Then take your sharpie and trace the indented word and fill in with black marker.

bathroom fill in

After all the signs have been filled in I sanded each one giving them a unique weathered appearance. Then measure three equal length pieces of twine and glue them to the back

bathroom ropebathroom glueThat’s It! Then you hang and admire your hard (crafty) work :).

bathroom1

bathroom upclose